
If you’re like me and want to tinker with all aspects of your Steam Deck experience or just want to get a game to run better, it’s very likely at some point you’ll want to install a custom version of Proton. You can either build one from source yourself or you can download one from a trusted source. If you don’t want to go through all the effort and time of patching a custom wine build and then bundling that together into a custom proton build, I’d recommend looking into the releases on GloriousEggroll’s GitHub.
So how do you install a custom version of proton? It’s pretty straight forward once you have a custom version of proton handy. I’m going to use GE-Proton7-29 by GloriousEggroll, but the steps are going to be the same regardless of the custom proton version you have.
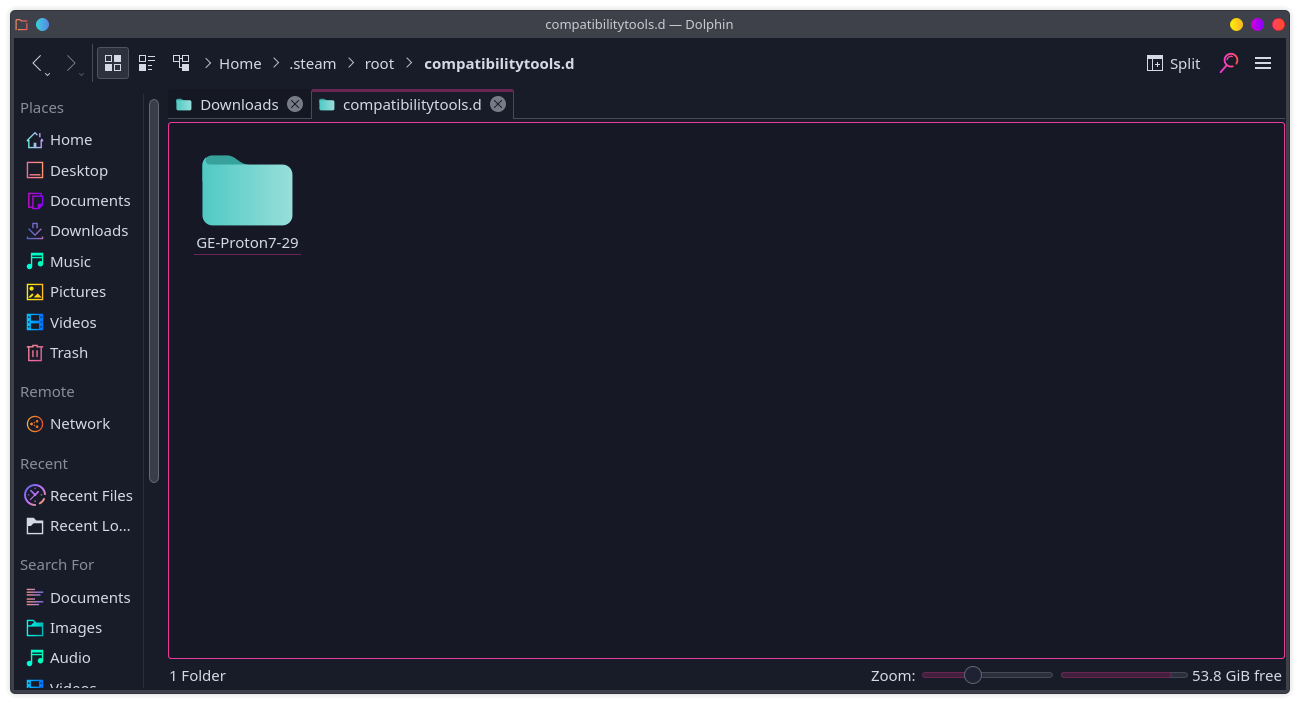
Once you have it downloaded you’re going to need to create a compatibilitytools.d directory in your steam install root directory. On the Steam Deck that will be located at
/home/deck/.steam/rootYou’ll need to enable viewing hidden folders to see the .steam directory, but once you’re there just right-click and create a new directory. You’ll need to name the directory
compatibilitytools.d
With that done, you only have to move the custom proton folder into it. Since I’m using GE-Proton7-29 and it comes compressed as a .tar.gz so I just need to right click on the compressed file and extract it into the compatibilitytools.d directory we just created.

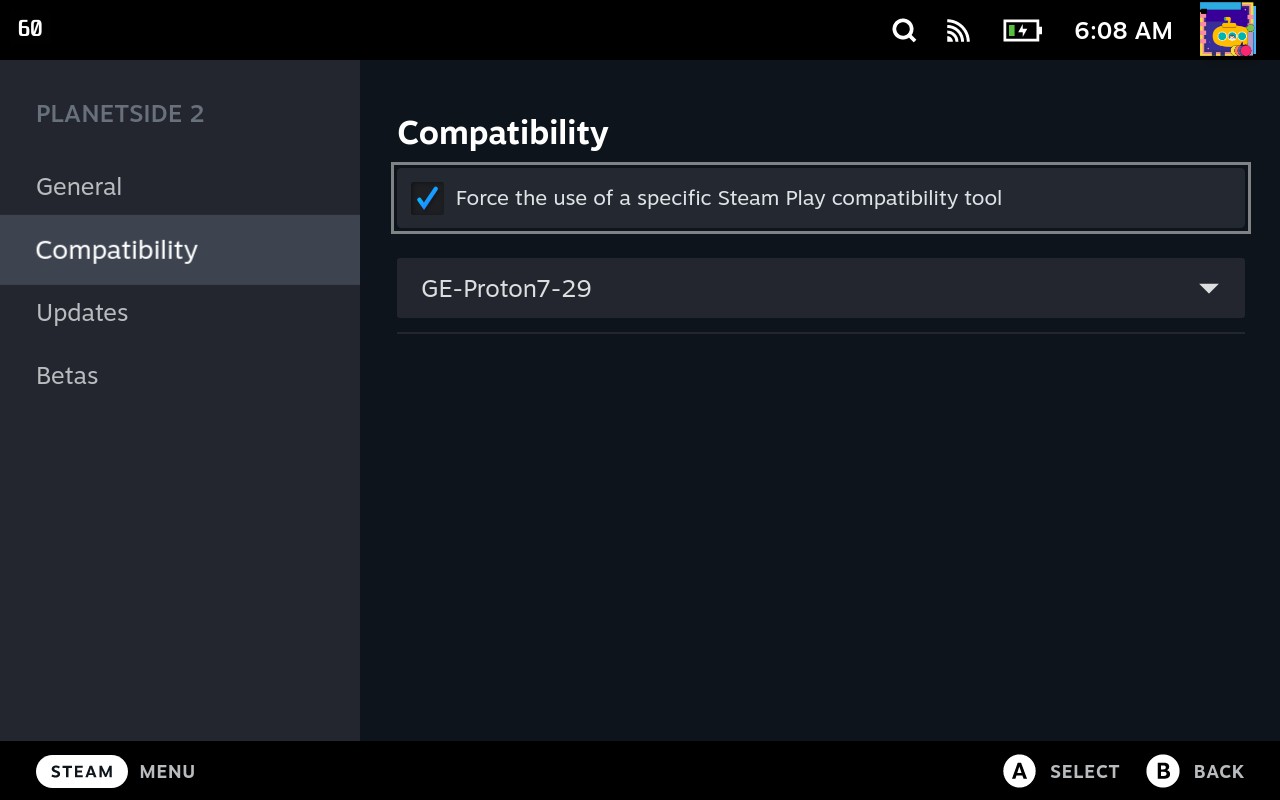
All that’s left is to restart steam, and either enable the custom proton globally (which I wouldn’t recommend) or for a specific game. To enable for a specific game, you just need to open the Game Properties. Navigate to the Compatibility subsection.

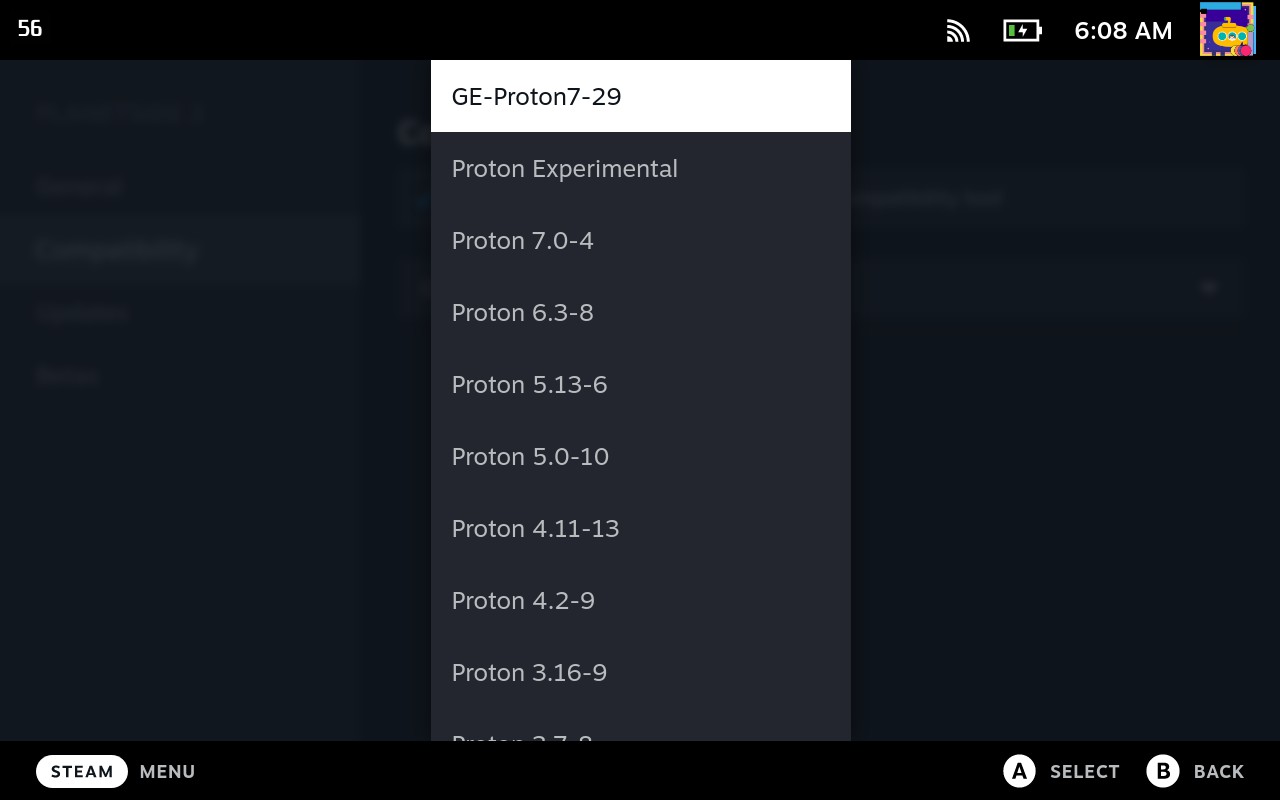
Check the box for “Force the use of a specific Steam Play compatibility tool”, and select the version you wish to use from the drop down menu that appears.
That’s all there is to it. You’re now running a custom proton install, and if it doesn’t work well or Valve releases a fix for your game bundled in a official proton, all you need to do is uncheck the box for “Force the use of a specific Steam Play compatibility tool” and it’s reverted. You may want to delete the proton prefix for that game, but that isn’t always required.
2 replies on “How do I install a custom Proton Build on a Steam Deck”
[…] leave it out of this writeup, but if you happen to need it for something else we do have a tutorial on installing a custom proton build using Glorious Eggroll as an […]
[…] it has a Silver rating. Most users have a good experience, with some using a custom proton install, Glorious Eggroll. There seems to be some stuttering and artifacts, but overall the reviews are […]